Gunsmithing: GLOCK Smithin’
Posted by Junior Shooters
Ah Glock’s, you either love em or well?hate is a strong word but it is all about fit in a shooters hand and yes, even appearance. The main attraction is the polymer or plastic frame which takes weight away from the gun and even takes up some recoil from the shooter.
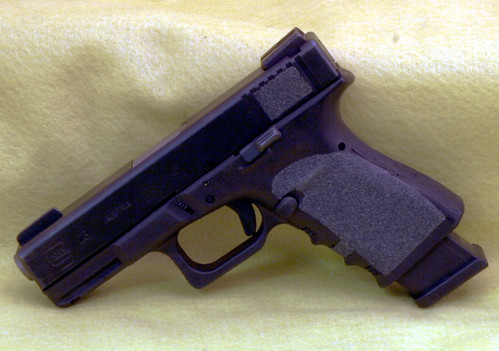
I also like the plastic frame of the Glock because it lends itself to more shooter beneficial modifications. Some of the mods I do for the Glock shooter include high gripping the frame. This entails raising the grip frame where your middle finger sits under the trigger guard to put your hand just a bit closer to the center line of the bore. It helps with recoil and also taking the edges off to aid in overall grip comfort. 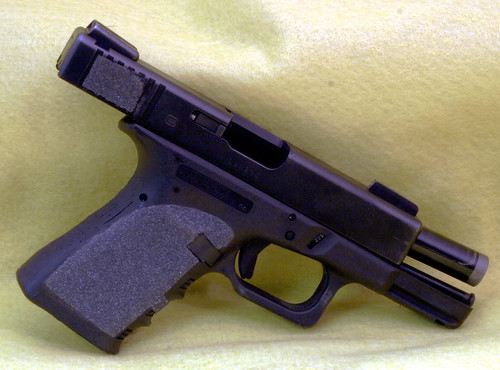 Another frame mod is to bevel, ever so slightly, the magwell just to remove any plastic “flash” from the mold process and to give the reload just a bit smoother entrance.
The Glock design is a simple and excellent bit of engineering with very few parts and those that are there are hardy and pretty indestructible. One major bone that shooters have is the trigger. Yes, it’s weird, but with just a few minutes and some basic tools you too can be a Glock Meister! (A Glock with the slide back)
The ATF calls the Glock a double action only pistol, this means for every one pull of the trigger the firing mechanism makes two motions. Back and forth, double action. While you really can’t change this but you can smooth the action up and lighten the trigger. First, is the trigger connector, the 3.5 pound connector. Installation is simple, after disassembly of the gun and frame parts. A small screwdriver or blunt end punch about 4 inches long will suffice. 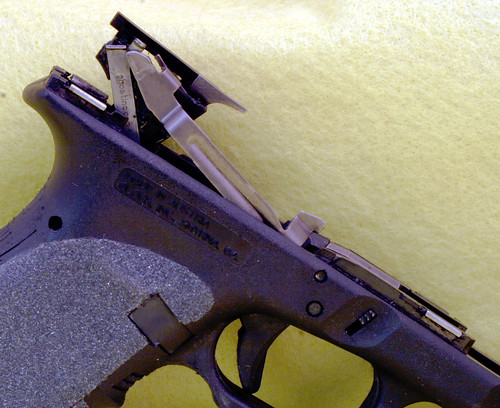 Remove the frame pins and pull out the block in front of the trigger slot. Remember how this part goes back in. On the back of the trigger bar is the connector, the shiny angled thing, pop this out and replace it with the new one. The angle of the trigger bar connector end is shallower to allow the trigger to release easier. I usually put a good basic polish on the metal to metal surfaces of the trigger bar where it releases the firing pin, or striker, as it’s called, the top of the bar where it depresses the striker safety and the end of the bar where it rides on the connector. (The slide is removed)
Polishing is just that, little to no metal removed but mirror shined surfaces with no burrs or sharp edges.
I hope I haven?t lost you yet, only a little more to go. I usually change the striker spring to a lighter weight, i.e. thinner wire spring and the striker safety spring as well. Remember, no cutting of springs, a shorter 10 lb. spring is still a 10 lb spring.
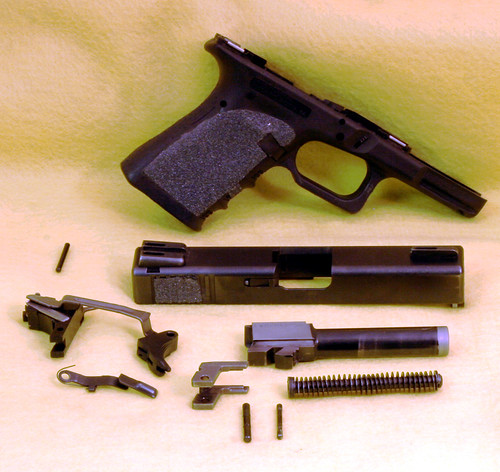
(From the top: frame, slide, barrel, guide rod assembly. Going left: locking block, trigger, trigger bar, connector, and the connector block.)
Reassembly is easy. Sure, right, no really, put the whole trigger assembly back in the gun, replace the small pin in the rear of the pistol, slide the locking block down in front of the trigger, put the top pin in the hole then place the slide lock in the frame inside next to the trigger assembly and then slide the large pin, right to left to secure it. Done.
The slide slides onto the frame, no pun intended, and then you are back in biz with a much better trigger pull, both lighter and smoother.
There’s a whole bunch of other upgrades that can be done to a Glock. Sights, grip sleeves or skateboard tape, my personal favorite. Longer barrels can be added and so on.
There are even replacement frames made from aluminum or stainless steel to change your Glock to. That’s for the hard core Glock Meisters. There are GlockTails – to go on the back of the guns for you meaty handed shooters. This handy little item helps the gun point a hair lower and protects the web of your hand between the thumb and index finger form getting sliced. There are also Stainless steel slides to add and or change calibers all the way up to .50 GI. (Large bullet, slow moving, should be fun to shoot with not to bad recoil) but we’ll check on that later.
The Glock is in use around the world in many capacities, Law Enforcement, self defense, competition and general fun by all ages. I raised my boys with Glocks, among others, so if I can shoot them you can too.
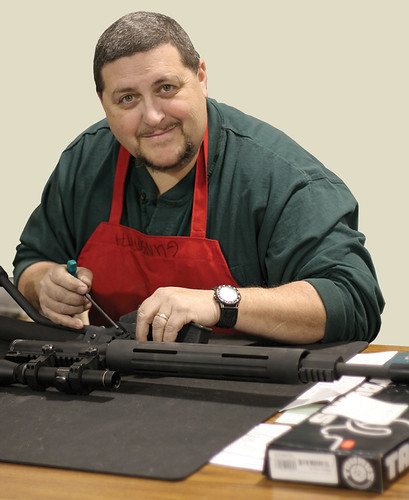 As far as clean and lube, that’s the easiest part. Clean the barrel out and wipe down the gun as you would any other. Make sure you check and then re-check that the gun is unloaded before you do any of this, I know I’ve said this before, never can be too safe.
Six drops of gunblue, your choice is all you need. One drop on each steel rail, that’s 4, one on the connector where the trigger bar slides down and one on the top of the barrel just forward of the chamber. Remember, plastic usually doesn’t need lube so don’t over do it.
Any questions as always, drop me an email or a call.
We’ll talk again soon,
Shoot safe, have fun
Doc
-
Robert ?Doc? Krone at RK Gunsmithing: www.rkgunsmithing.com
-
GLOCK: www.glock.com
Copyright & Published By: Junior Shooters and Junior Sports Magazines Inc. Feb 2009













Comments